This dedicated page is designed for the management of alert rules and criteria. It enables users to set up alerts based on specific needs and conditions. Additionally, users can easily update existing alert rules or remove any that are no longer required. This document will guide you on how to setup an alert to your Sensorbee device.
Setup an Alert
This step by step instruction will guide you in setting up an alert to your Sensorbee device. Please refer below:
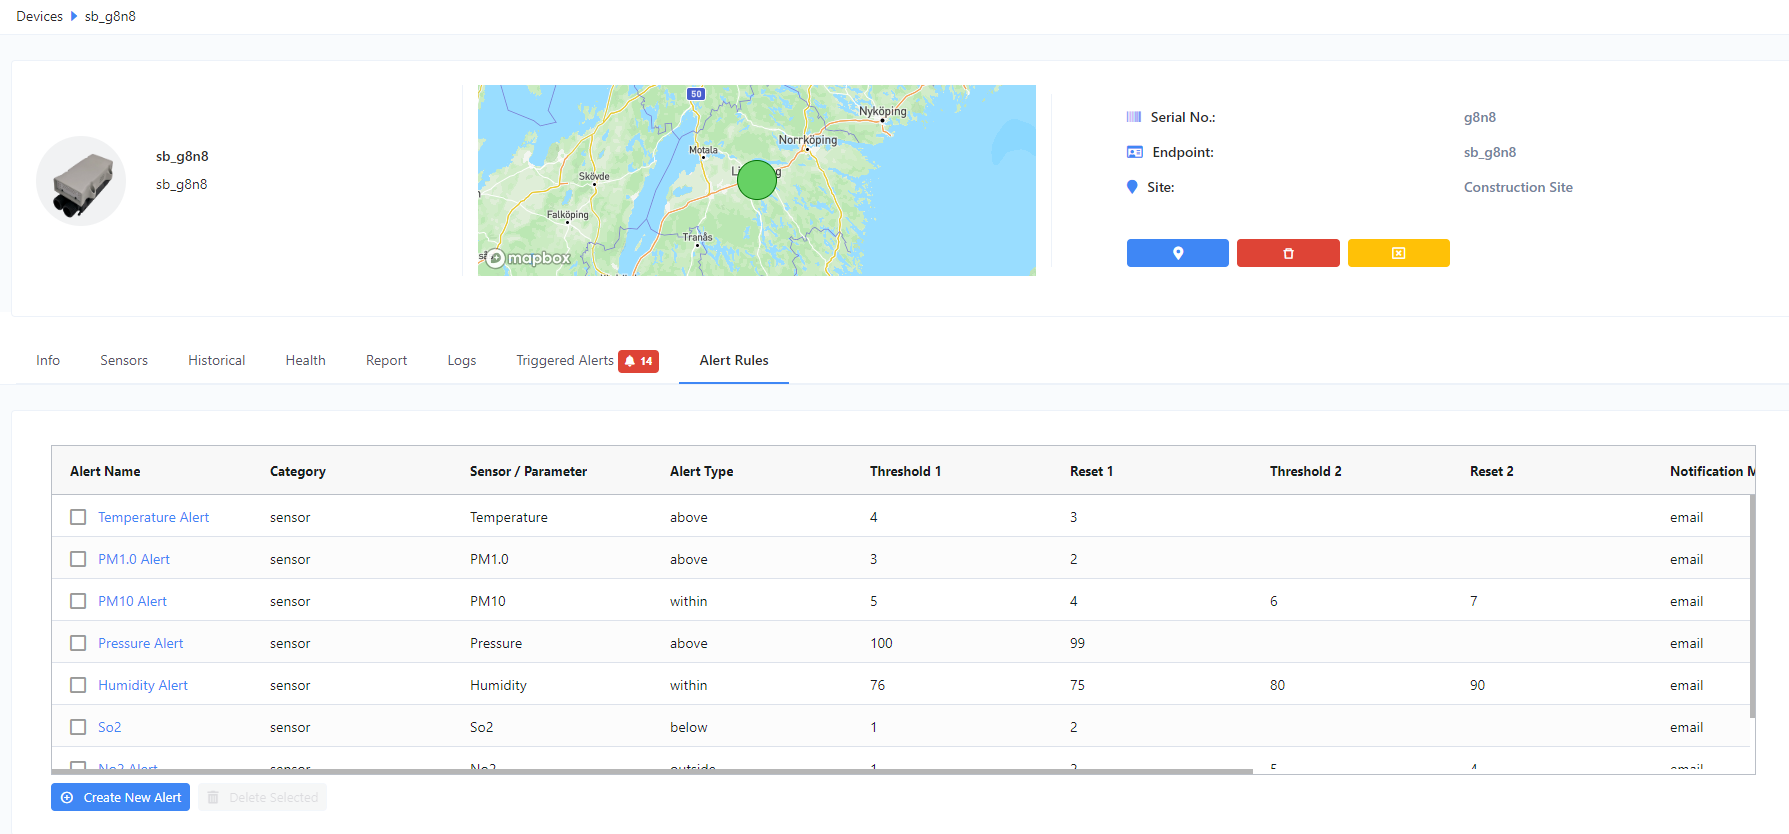
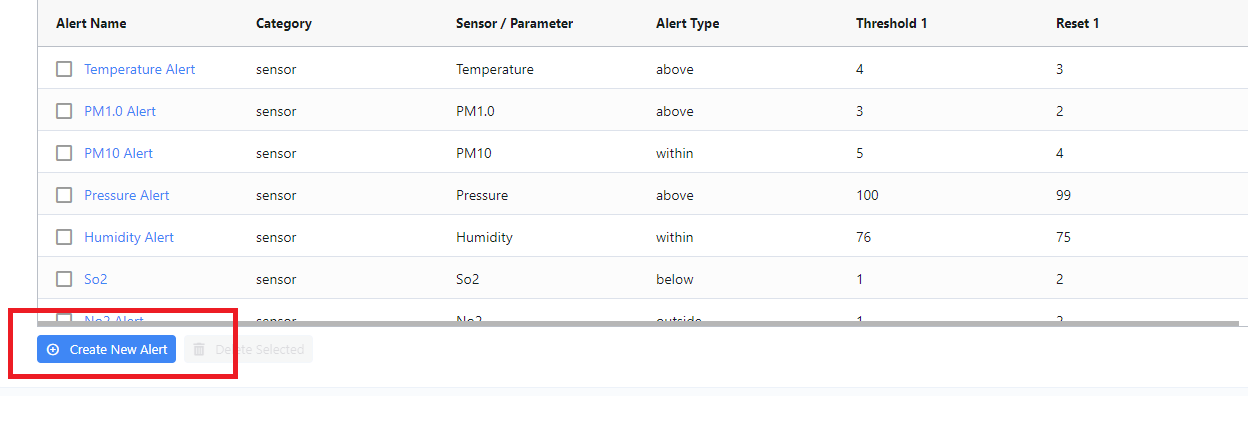
- Step 1: Go to the Alert Rules tab and click on the “Create New Alert” button.
- Step 2: A modal will show up which will allow you to specify the alert rules according to your criteria and conditions.
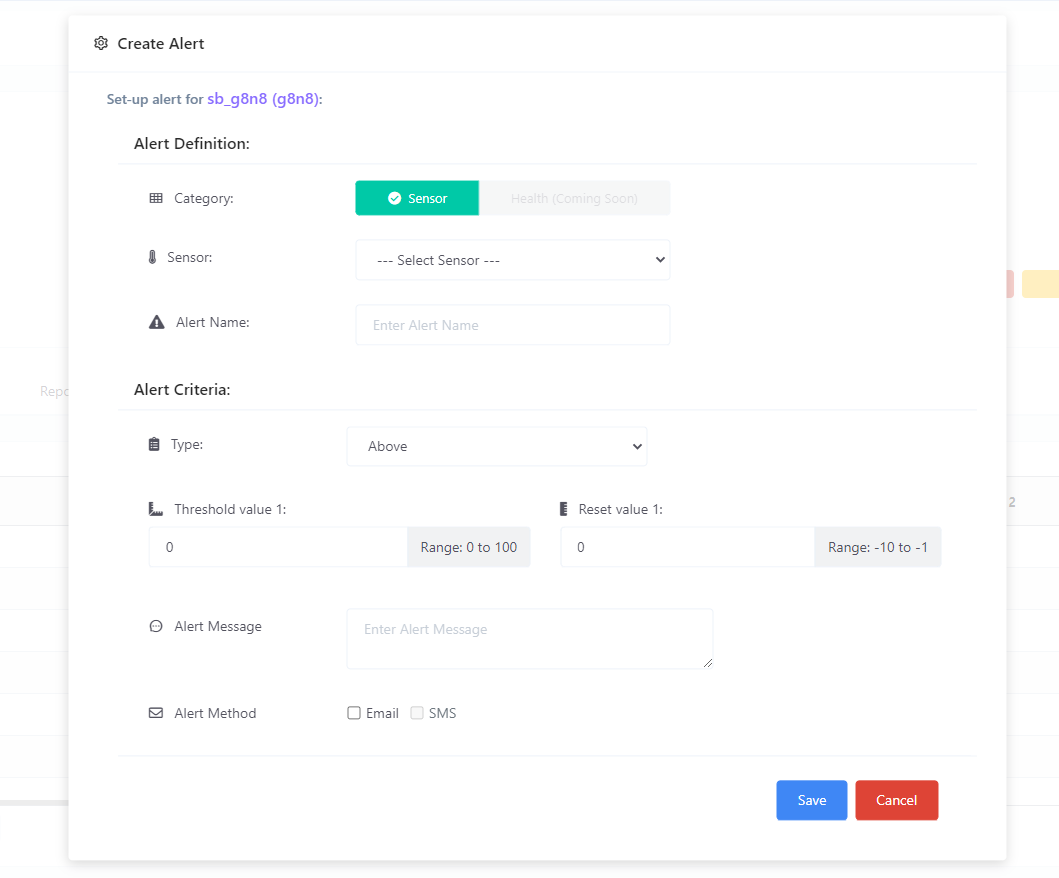
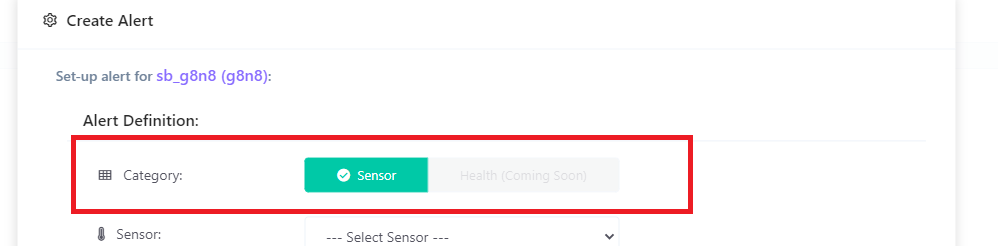
- Step 3: Then select an alert category. An alert can be a “Sensor” alert or a “Health” alert (please see below). However, as of now, only Sensor alert is available. The health alert is yet to be available in the future.
- Sensor Alert - An alert which conditions are based on the sensor readings.
- Health Alert - An alert which conditions are based on the device health, such as Battery, Signal Strength, etc.
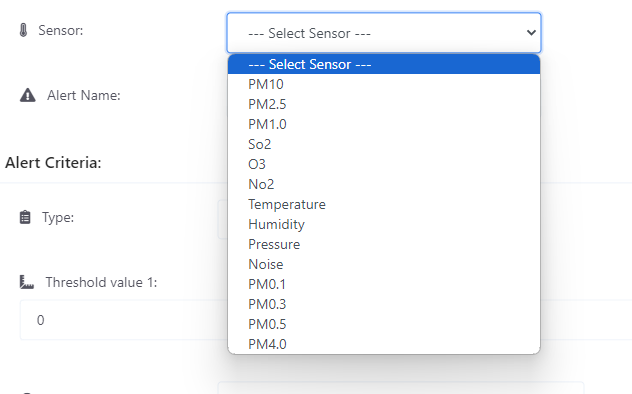
- Step 4: Then select the sensor where your alert’s conditions will be based upon. Please take note that the sensors listed here will be based on the sensors available to your device. Also not all sensors can be set with alerts. Only the PMs, So2, O3, No2, Temperature, Humidity, Pressure and Noise are the sensors that you can set alerts with.
- Step 5: Now you need to set an alert name. You can set any name you want, as this will allow you to identify this alert by the time it will trigger in the future.

You’re almost half way! Now it’s time to set the alert criteria. These are set of conditions that the alert would base upon before it will notify you. Additionally, these criteria will differ according to the Sensor and Alert Type that you will select on the next steps.
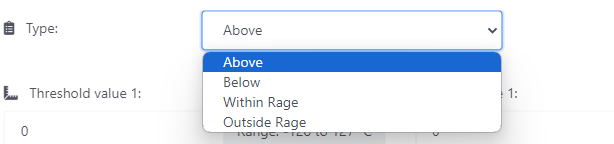
- Step 6: Select the alert type. For details please refer below:
- Above - This type will trigger an alert if the sensor reading is “above” the alert threshold.
- Example: If sensor reading is above the criteria of 25 degree Celsius.
- Below - This type will trigger an alert if the sensor reading is “below” the alert threshold.
- Example: If sensor reading is below the criteria of 25 degree Celsius.
- Within Range - This type will trigger an alert if the sensor reading is “within range” the alert threshold value 1 and threshold value 2.
- Example: If sensor reading is within the criteria range of 25 - 30 degree Celsius.
- Outside Range - This type will trigger an alert if the sensor reading is “outside range” the alert threshold value 1 and threshold value 2.
- Example: If sensor reading is outside the criteria range of 25 - 30 degree Celsius.
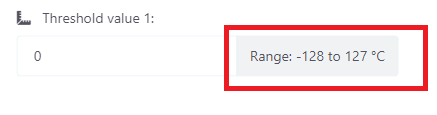
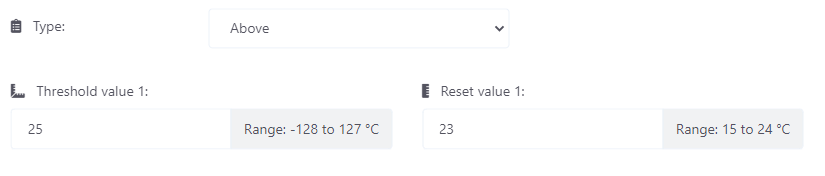
- Step 7: After selecting the alert type, you now need to provide the threshold for the alert criteria as well as the reset value. The number and range of threshold and reset value will vary depending on the sensor and alert type that you have selected from the previous steps. Please refer below for more details:
- For type “Above” and “Below”:
- You need to provide one threshold value that is within the allowed range for the sensor.
- You also need to provide one reset value that is within the allowed reset range.
- For type “Within Range” and “Outside Range” :
- Provide two thresholds, Threshold value 1 and Threshold value 2.
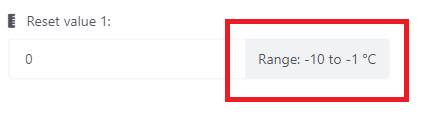
- Provide two reset values, Reset value 1 and Reset value 2.
- Now it’s important that you understand the concept of “Reset Value” as this would affect the number of times that you will be notified with alerts. See example scenario below:
- Let’s say you have an alert with a criteria that is “Above 25°C”, and a reset value of “23°C”.
- Then the temperature reading reaches 26 °C, so by this time you should be able to receive an alert.
- Then on the next interval, the temperature reading reaches 27°C. This time however, you won’t be able receive a new alert anymore. That is because the device will wait until the sensor reading is reset back to 23°C before it would send another alert.
- The reset value will serve as a reset point before the device would send another alert (since the previous alert). This also prevents multiple alerts in a short span of time.
Since these types are dealing with range conditions you need to:


- Step 8: After you’re done with the threshold and reset values, you now need to provide an alert message. This would be included in the alert notification that you will receive thru email or SMS.

- Step 9: Then lastly, you will need to choose for the alert method
- Email - If email, you need to provide a valid email address. By default the value will be sourced from your account information.
- SMS - If SMS, you need to provide a valid mobile number. By default the value will be sourced from your account information. Note: This is yet to be available in the coming weeks.

- Step 10: Now you can click submit and wait for the alert to be triggered.
Alternative location for creating alert
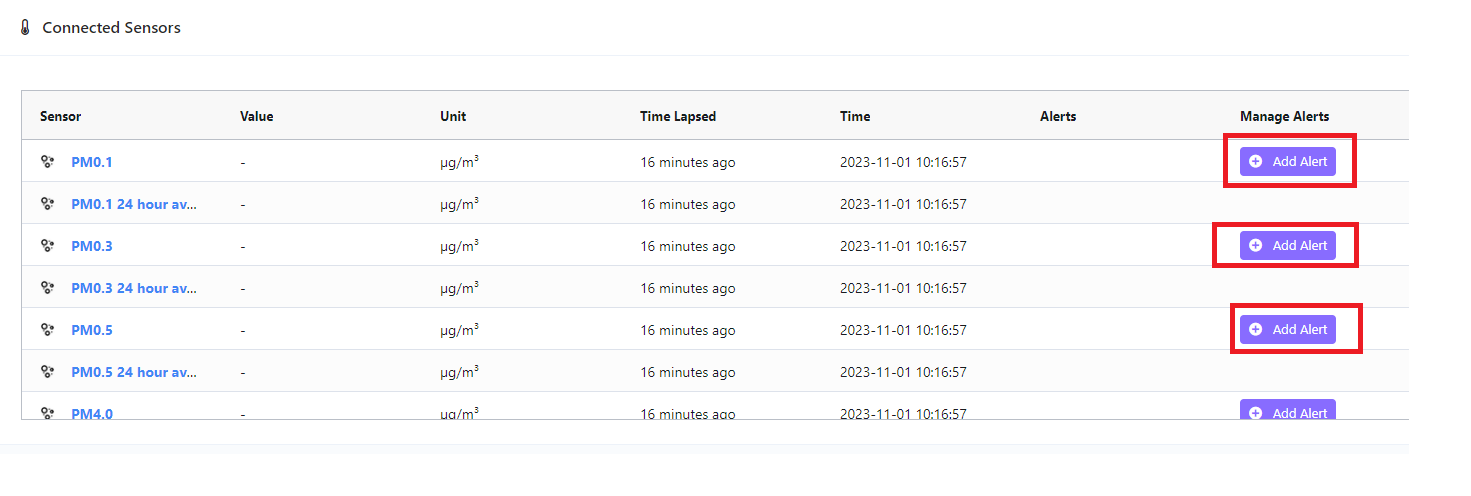
In the sensors tab, you can directly setup an alert to a specific sensor by clicking the “Add alert” button under the “Manage Alerts” column.
Updating Alert
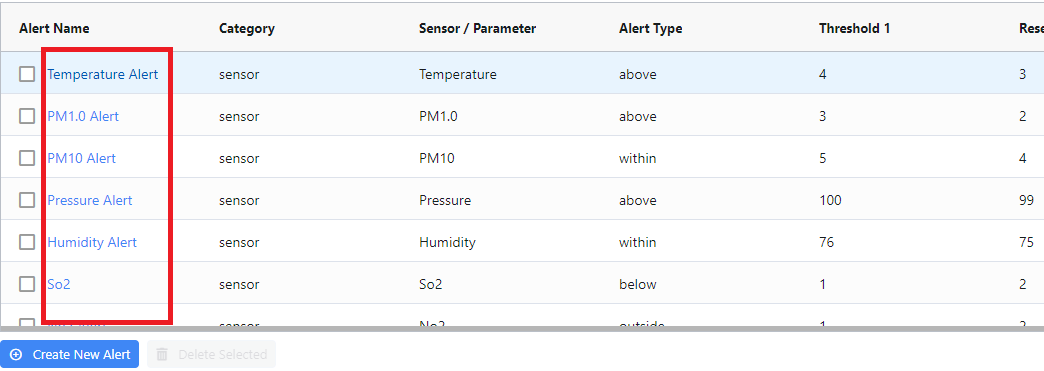
In order to update an existing alert, all you need to do is click on the alert name, from the grid, and an alert modal will show up. From there, you can update the criteria and conditions.
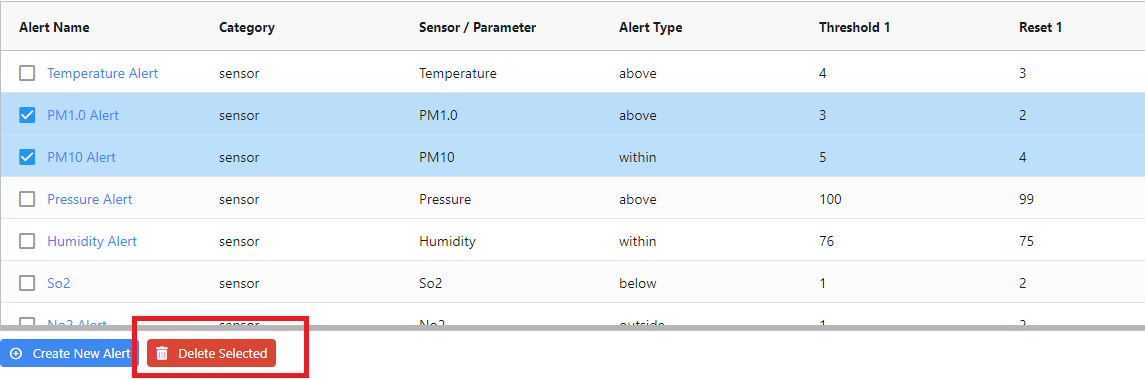
Deleting Alert
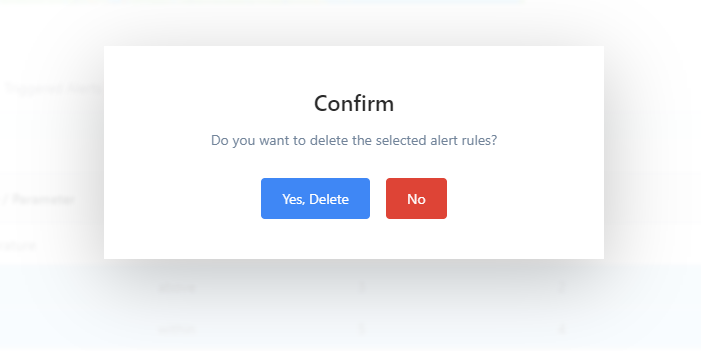
In order to delete an alert, all you need to do is to select it from the grid, by checking on the checkbox. You can select one or more alerts at the same time. Once selected, you can now click the “Delete Selected” button.
A confirmation box will show up, asking you to confirm your action. Click “Yes, Delete” to proceed.