
A particle sensor is a precision instrument designed to measure particulate matter (PM) in the air. Utilizing laser-based technology, it captures a wide range of particle sizes, providing in-depth insights into air quality and potential health effects.
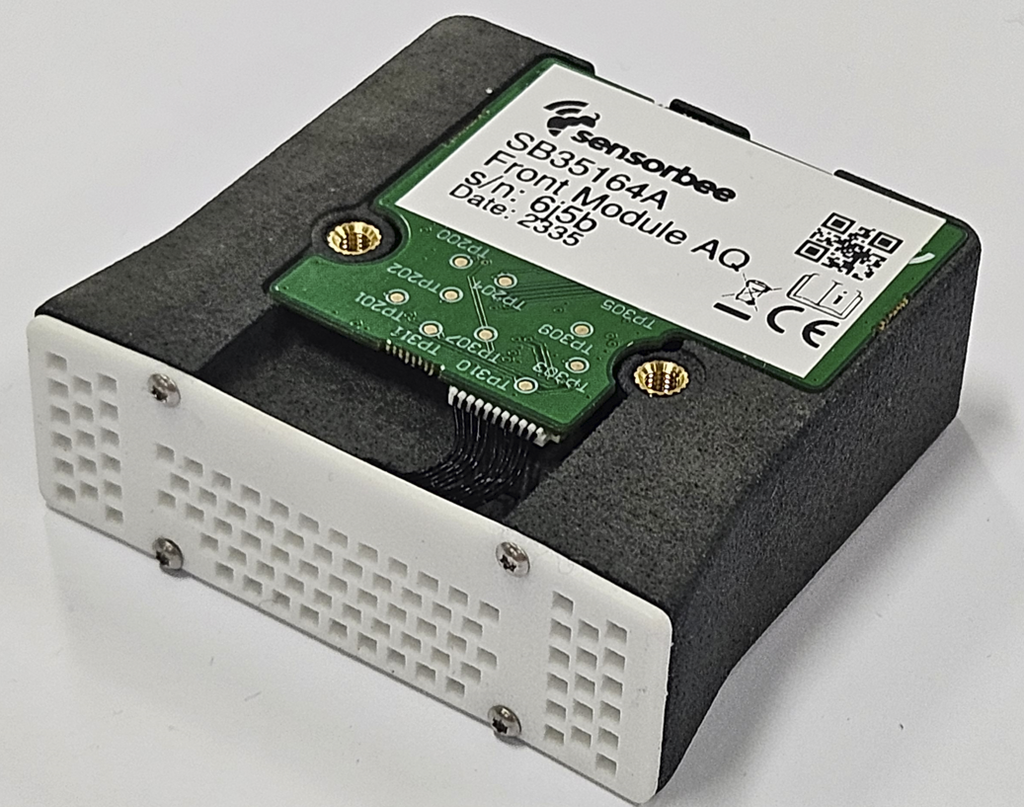
In the Sensorbee Pro series, which encompasses both the Air Pro and Modbus Pro, the particle sensor is conveniently located within the front-end module (SB3516). This comprehensive module seamlessly integrates the particle sensor, temperature sensor, humidity sensor, ambient pressure sensor, and noise sensor
For comprehensive sensor specifications and performance metrics, kindly consult the SB3516 datasheet.
Conversely, in the Sensorbee Lite models, specifically the Air Lite and Modbus Lite, they primarily incorporate the particle sensor(1). However, measurements for temperature, humidity, and noise are taken by a distinct sensor(2) (SB3380).
To understand the performance of the particle sensor used in the Sensorbee Lite products, please consult the SB3516 datasheet. While the Lite models do not encompass the entire range of sensors found in the Pro series, they utilize the same particle sensor. Kindly concentrate on the particle sensor performance section for accurate details.
Limitations in Low-Cost Particle Sensors
In the realm of air quality monitoring, low-cost particle sensors such as the SPS30 provide a means to measure particulate matter concentrations economically. However, it's essential to understand the inherent limitations of such devices, particularly when it comes to the measurement of larger particle sizes like PM10 and PM4. The SPS30 sensor's approach to these measurements is explained in Sensirion's own words:
"One of the limiting aspects of today’s laser-based particulate matter sensors is their limited detection rate with respect to the actual sampling volume. [...] The number count density of the PM10 fraction of typical aerosols is extremely low; therefore, PM10 cannot be measured directly by low-cost PM sensors. [...] Therefore, the PM4.0 and PM10 outputs of Sensirion’s PM sensors are estimated from PM0.5, PM1.0, and PM2.5 measurements considering typical aerosol profiles instead of being based on 'real' raw data events from large particles." — Sensirion Particulate Matter Sensors Specification Statement
This excerpt underscores a critical point: the values for PM10 and PM4 reported by low-cost sensors like the SPS30 are not direct measurements. Instead, these figures are derived estimates based on the detection of smaller particles and statistical modeling. This approach is necessitated by the sensors' design, which captures only a fraction (e.g., 3-5%) of aerosol particles, thus relying on extrapolation for larger particle sizes.
For users of the SPS30 sensor, it is crucial to acknowledge these constraints and interpret the PM10 and PM4 data accordingly.
Installation
If the unit is connected to an external power source, such as a power supply or solar panel, ensure to turn off the power. For Air Pro units, the status LED will illuminate red for 10 seconds and then turn off, signaling it's safe to proceed. For Modbus units, disconnect the incoming power from the terminal block to ensure the power is completely off.
Pro Series
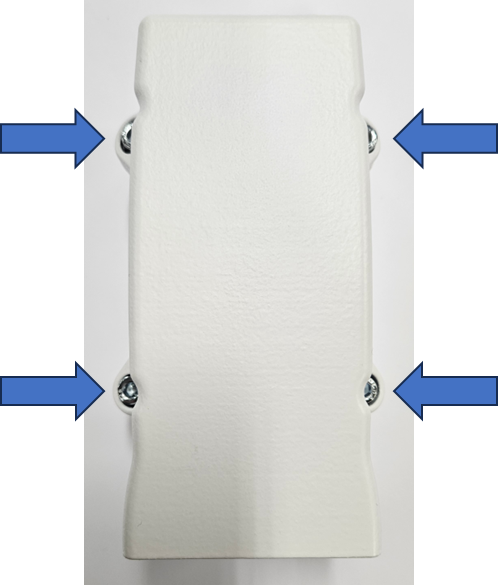
Use an PH2 Phillips screwdriver to unscrew the sensor-house from the base as shown in figure 3.
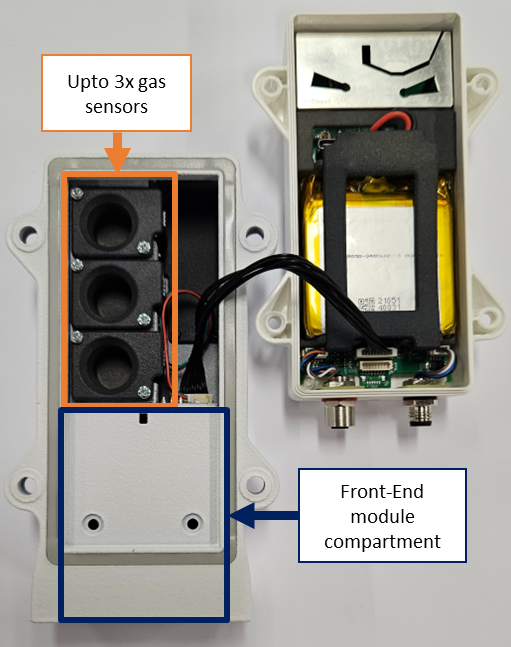
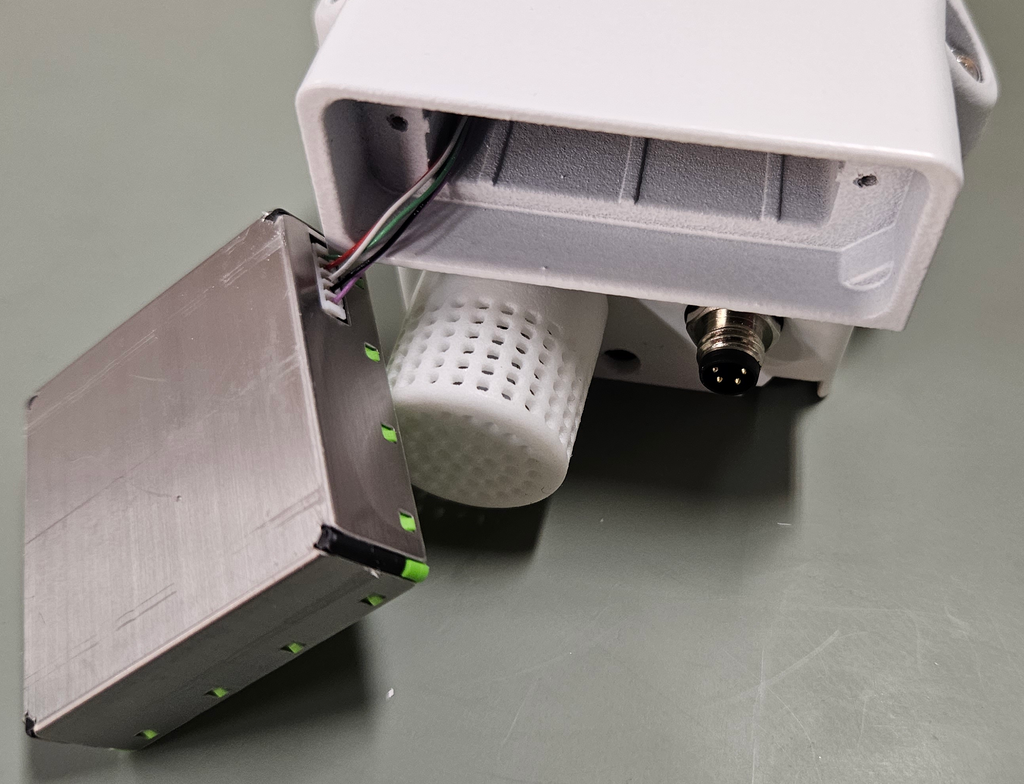
Place the sensor-house upside down next to the base, without disconnecting the cable between them as shown in figure 4. Figure 4 shows an Sensorbee Air Pro, the princip is the same on the Sensorbee Modbus Pro.
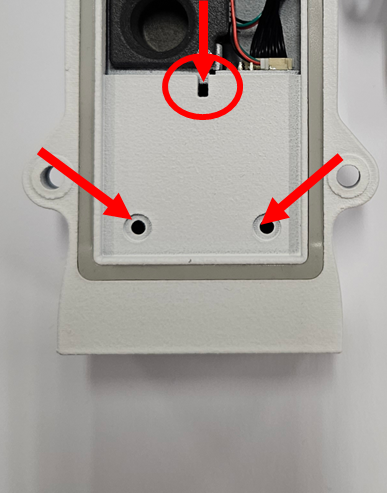
If there is an old front-end module already mounted, start by carefully removing the two small Philips-head screws that secure the module in place. Utilize a slender tool, such as a fine-tipped probe or a small flat-head screwdriver, to gently push out the module. Apply gentle pressure through the designated small hole, as indicated in figure 5, to gradually eject the module from its housing.
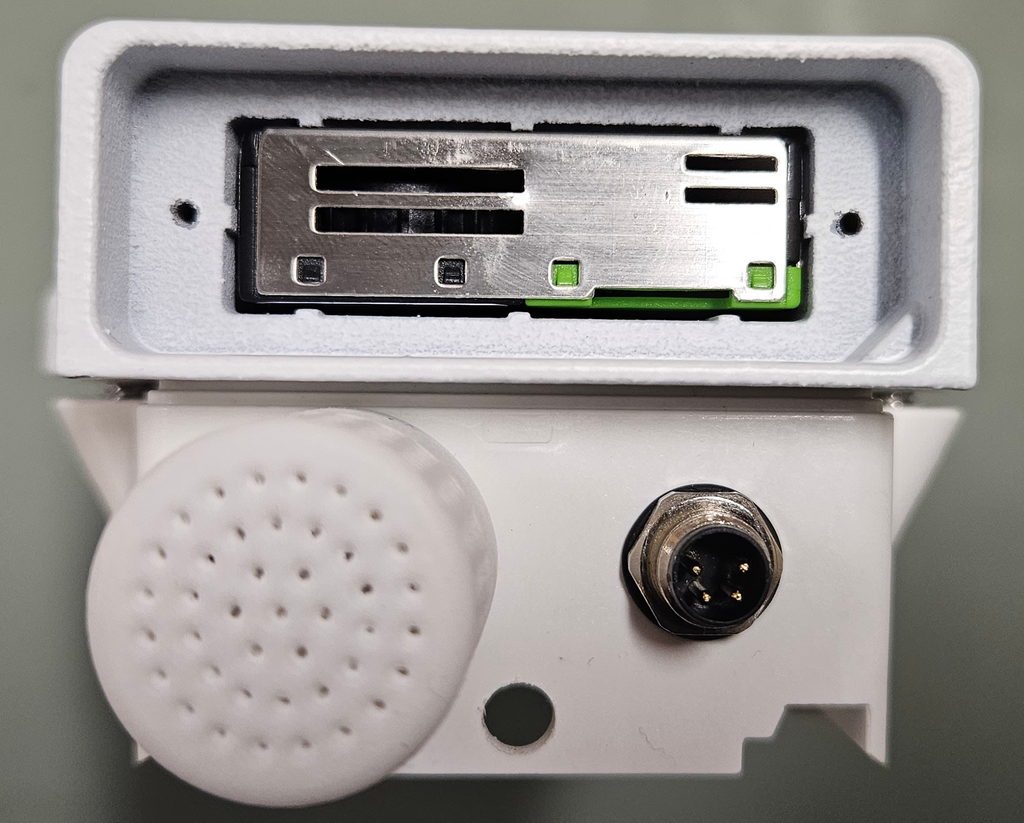
Start by holding the new module close to the slot where it will be installed.
Carefully slide in the new module until the screw holes of the module align with those of the device.
Once the screw holes are perfectly aligned, fasten the module in place using the two small Philips-head screws that were previously removed.

Lite Series
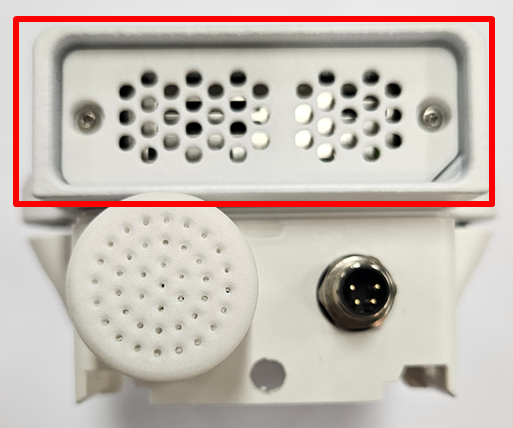
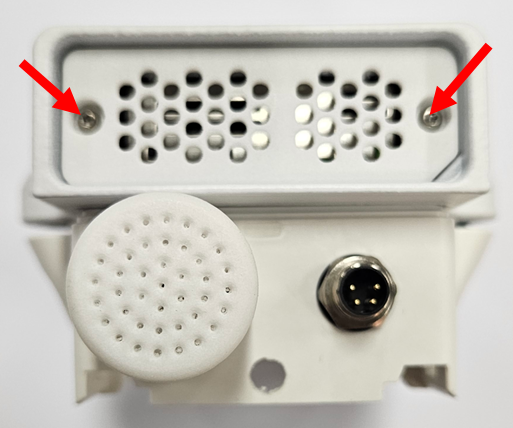
Use a T6 Torx screwdriver to loosen the screws of the grille protecting the particle sensor as shown in figure 7.

Carefully pull out the particle sensor using tweezers or a good pair of pliers. Then, fold the sensor to the side to detach the connector. Connect and insert the new particle sensor, push it in the same orientation as the old one, and secure the grille with the screws.
Particle Sensor