
Location selection depends on the application, such as urban background monitoring, traffic monitoring, etc. The user should consider the following when selecting the final location:
- Install the unit far away from pollution sources that are very close and have insufficient air flow (such as chimneys, air conditioners, etc.) that may disrupt your readings.
- Install the unit between 3 and 4 meters high.
- If the unit is installed with a solar panel, place the unit at a safe distance from buildings, trees, and other obstructions to ensure that the solar panel receives maximum solar radiation. This will guarantee a proper battery recharge and prevent Sensorbee Air from running out of battery.
- If a unit is installed in a location that might not receive enough sunlight for extended periods, such as in northern countries, an external power source is recommended instead of a solar panel.
- For optimal sensor performance, it is recommended to mount the unit in a location that is not directly exposed to sunlight or receives as little sunlight as possible.
To ensure proper operation and due to design, Sensorbee Air products must be installed with the air inlet of the sensors facing downward. Different types of installations are possible, such as vertical masts, walls.
Connecting the external cables to the unit before clicking it onto the bracket may be easier.
When the external power cable is connected to the unit , the status LED should light up as described in earlier chapters. This indicates that the unit has started up correctly and is connected to the server.
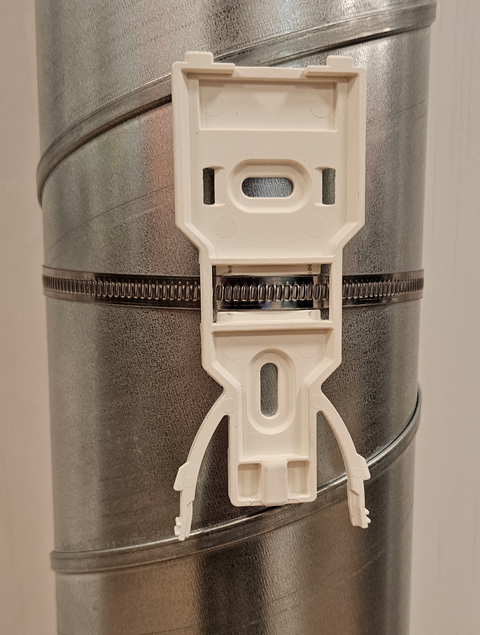
9.1 Installation to Mast
As figure 1 shows, the mounting bracket is attached to the mast using a stainless steel hose clamp. Once this is done, the unit can be clicked onto the bracket and the external cables can be connected to it.
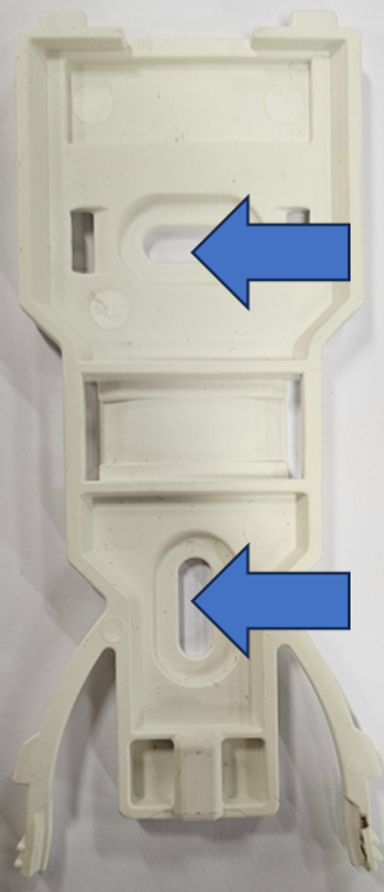
9.2 Installation on Wall
Attach the mounting bracket to the wall using two screws, as shown in figure 2. Then, click the unit onto the bracket and connect the external cables to it.
Either use the solar panel or the wall adapter to power the unit.
Refer to Sensorbee accessories for more information.
The unit has been deployed and is sending sensor data to the server.
For further information, please refer to "The Sensorbee Cloud Services".